
SASS
Premier
Match Management
& Scoring System
Table
of Contents
Registering SASS Premier Scoring & Match
Management System
Setting up States for Regional or State
Match:
Special note
about the reports that merge data into MS Word.
Scoring a
Stage DQ or Match DQ;
Switch
between Monthly and Annual match.
Adding
extras and tracking information (dinner tickets, RO Classes etc.)
Changing
match fees, adding new fees.
Sending out
registration forms.
Printing
Confirmation letters:
Printing Banquet/Dinner
tickets
Printing Match Directors Guides:
Printing SASS Shooters Hand Book:
Printing ROI and ROII course material:
Printing SASS Premier Scoring & Match
Management System Manual
Enter scores
into the side match
Individual
Confirmation letters
Copyright © 2002 by
Tom Remily
All rights
reserved. Printed in
the
The SASS Premier Scoring & Match Management System is designed to score up to 18 stages. Scoring is done by rank points, Total Time, Category Rank point and final match by Total Time.
The program can run 5 separate matches.
The program is written in MS Access 2007 VBA. It is split so the application is separate from the actual databases. This allows the program to be updated without affecting the data already entered.
The SASS Premier Scoring & Match Management System can be used to track all aspects of your annual match registration information. There are reports for registration, banquet tickets, posse assignments, Shooters badges, and stage score sheets, as well as others listed under the Reports menu.
The Scoring section of the program can track misses, procedurals, minor safety and bonuses in addition to time.
If your club has annual dues you can also produce these on the anniversary of the shooter join date.
.
· Pentium III or above
· 512Meg RAM (the more the better)
· Windows XP or above
·
CD drive and Hard disk
· The program fits best when screen resolution is set to 1024X768.
· If you have MS Word you can print the standard registration letters and match certificates or design your own. It is not required.
· All mailing labels use standard Avery 8160 or 5160 labels.
Insert the CD into your CD drive (usually drive D). The installation program should start automatically but if it doesn’t, go to the start, select run and type “d:\install.bat” in the open box, replace the D with the drive letter of your CD drive, press enter.
The system will create a
directory called SASS Premier on the C drive and the Scoring program will be
installed into it. During the installation process follow the installation
prompts, the system will reboot once or twice (depending on your operating
system) during the installation, after rebooting the install program will
continue. During the installation
process when you are prompted, always
accept the install default options. When
installation is complete an icon will be placed on your desktop.
Registering SASS Premier Scoring & Match Management System:
SASS Premier Scoring & Match Management System comes with a registration form that you should fill out or you can register online at www.ponyexpressmatch.com/registrationform.htm. All registered clubs get 1 year free maintenance, after the one year you will receive a renewal notice to continue the maintenance. Your annual maintenance includes all technical support either via phone or internet, and all updates.
All MS Word documents used in the SASS Premier Scoring & Match Management system are located in the c:\sass premier directory. You can modify any of these documents to meet your clubs specific needs. All documents already point to the location of the merge data, this data is located in the C:\cowboyextracts directory. Listed below are the merge document name and the data used for those documents:
Billing Letter.doc - clubbilling.txt
Billing Past Due Letter.doc - pastduebilling.txt
Certificate1.doc - ribbonlables.txt
All Certificate use same file
Confirmation letter1.doc - mmshoots.txt
All Confirmation letters use same file
cowboyBDcard.doc - birthdayselection.txt Standard Paper
packet labels.doc - regionalpacket.txt Avery 8162 or 5162 labels
wrpacket labels.doc - regionalpacket.txt Avery 8162 or 5162 labels
Registration1.doc - mailinglabels.txt
All Registration forms use same file
Ribbonlabels.doc - ribbonlables.txt Avery 5167
SASS Premier mailing labels.doc - mailinglabels.txt Avery 8160
Score Card Labels.doc - SCardlabels.txt Avery 8160
Sponsor Letter1.doc - vendormailinglabels.txt
Vendor Confirmation letter1.doc - VCLetter.txt
All Vendor Confirmation letters use same file
Vendor NA labels.doc - vendormailinglabels.txt

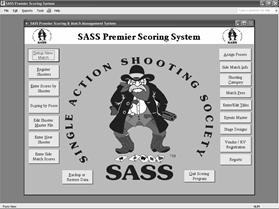
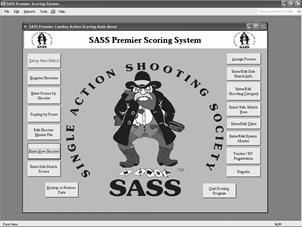
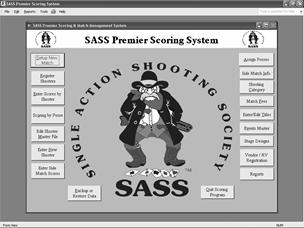
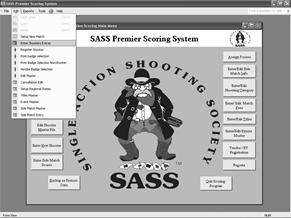
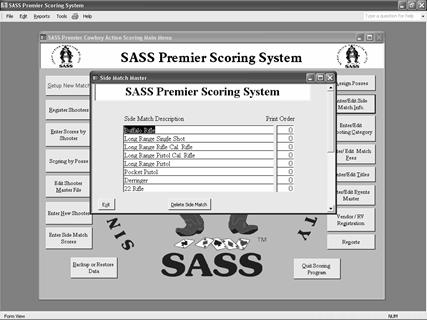
Scoring Program Main Menu
To start the Scoring program click the Start menu, then programs and look for SASS Premier, then select the SASS Premier, or select the icon that was placed on the desktop.
SASS Premier Scoring & Match Management System comes with category, match fees and some titles already set up. You may wish to check these out and make any changes you wish. Click on the Shooting Category, Match Fees, or Titles and check out the system defaults make any changes necessary. This may only have to be done once depending on how often you add new categories. During your annual matches you may want to setup your side matches and other annual match information. You can select the different procedures by selecting them from the main scoring menu or from the top menu bar under Edit. Most standard Windows short cut keys are incorporated into the SASS Premier scoring system. Example: When you see a character underlined on the menu you can use the keyboard shortcut Alt and the underlined letter to start that option. Also under the Edit menu on the top menu you have the Undo (Ctrl Z) option anytime during an operation you can use the Ctrl Z to undo a previous action.
When you scroll to the bottom of the screen there is a
blank enter line. Enter in a code
and the description.![]()
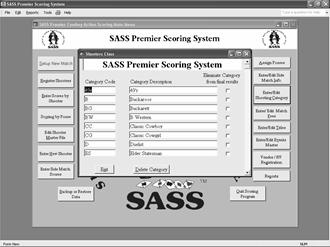
Click on the “Shooting Category” from the main menu. Move to the bottom of the list and enter a Category code, tab to description and type in the new category description. If you have a special category that you don’t want to show up in your match final reports check the box next to the category. This will eliminate that category from the match final report. It will however show up on all other reports. This feature can be used if you want to let shooters shoot with the posse that are not part of SASS or not Cowboy Action shooters.
The report sequence box is used to arrange the sequence you want the awards reports to be sorted in. If you have a special order you want to hand out awards you can use the report sequence to arrange the categories in that order. It’s a good idea not to just use consecutive numbers instead use 10, 20, 30 etc this way if you want to change the report order you will not have to renumber every category.
There is a stage statistics report located under the Special reports in the report menu, this report breaks down the stages by average time misses and procedurals, the report will list each category separately with an overall total at the end of the report. The eliminate category can be used to eliminate a category from the stats report, just check those categories you don’t want in the stats and run the stats report.
Note: Be sure to uncheck then when you are finished playing with the stats.
Note: When entering a new category the category code must be unique
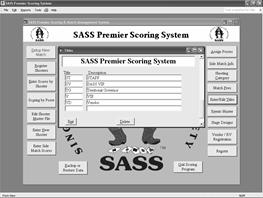
Click on the “Enter/Edit Titles” from the main menu. Move to the bottom of the list and enter a Title code tab to description and enter the new title description.
Note: When entering a new title the title code must be unique.

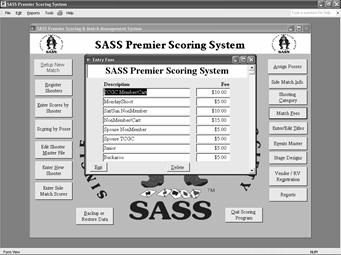
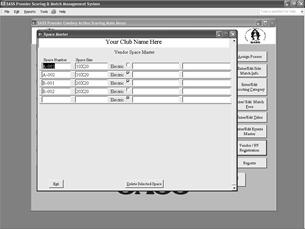
Adding Event Information:
To enter a new event scroll to the bottom of the enter
screen and enter the description, amount and date if needed.

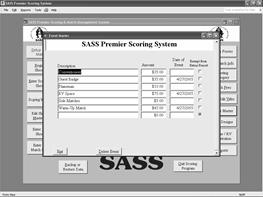
During annual matches if you offer different events you can enter the Event titles and price into the system. Select the “Events Master” from the Main Menu. You can enter a Description, price and the date of the Event. While registering shooters you can enter the events your shooters have signed up for by selecting “Enter Shooters Extras” from the registration screen. These events will print on the confirmation letters. You can also print an Event report that will show this information. When setting up your RV spaces and amount the letters RV must appear in the description, same holds true with the banquet or dinner those words must appear in the description.
Note:
When running a Wild Bunch, Warm Up, Plainsman or Black Powder match, the fees charged for these matches need to be entered into the “Events Master” The reason for this is because of the way some Warmup matches are run. Example: You may have Warm Up matches starting at different times, and early morning match 9:00 a mid day match 10:30 and a late afternoon match 2:30 by using the Events Master you can setup 3 different selections. When you register a shooter for a Warm Up match you can select the match time of day that the shooter wishes to shoot. This will also show up on the events report showing how many shooters you have for each match.
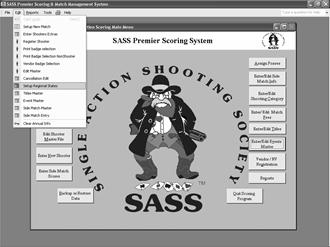
From the top menu bar select Add In then “Edit” then
select the “Setup Regional states”![]() Setting up States
for Regional or State Match:
Setting up States
for Regional or State Match:
For those
that put on Regional or State match you will need to set up the state(s) that
are in your region. This will then allow
you to print a report of the regional/state winners. Select Add In from the top menu bar them “Edit”
on the top menu bar select the “Setup Regional / States”, this will bring up a
state table,
Just select the state or states that are in your region
by checking the box next to the state.![]()
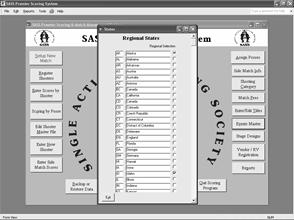
All
you need to do is select the state by clicking on the Regional selection next
to the state. The system will place a
check mark in the box. When finished
select exit. You can also add new states
at this point, scroll to the bottom of the form and enter a state code and the
state name.
Match fees are those fees you charge for shooting your
main match. You can setup as many
fees as you wish. Just scroll to the
bottom of the screen and enter the description and amount.
![]()
You setup your main match
fees by selecting “Main Match Fees” from the main menu. Enter the description you wish to use and the
amount you want to charge. See note under Events for special instructions about
entering Warm Up, Wild Bunch, Plainsman and Black Powder matches. It’s a good
idea to setup fees for comp shooters, certificate shooters by doing this you
will have a better idea of how many comp, free shoots
were awarded.
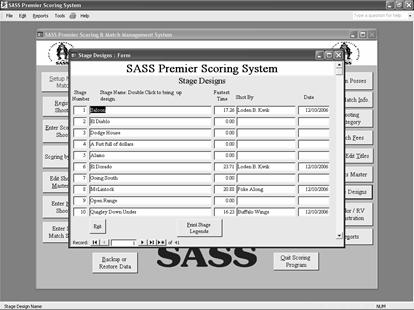
The SASS Premier
Scoring & Match Management System comes with a group of stage designs. You can view these design, print them or even
add designs of your own. The stage
designs are in a PDF format and can be viewed by select the “Stage Design” button
on the main menu. Each stage shows a
stage number, description, fastest time, shooter and a date. When you wish to
view a stage just double click on the description of the stage and the Adobe
Acrobat reader will bring up that stage.
If you want the system to track the fastest
time, shooter and date you need to make sure that you tell the system which
stages you are shooting. When you setup
a new match you will notice that in the Bonus /Skip stage section of the setup
screen you now have a box for stage number.
When you select a stage that you will be shooting you need to place the
number of the stage in the box for the appropriate stage. When you are finished
entering scores and do the update scores the system will check those stages you
are using and if anybody has shot a faster time for that stage it will be
updated.
Stage Number, Description.![]()
![]()
If you wish to enter
your own stage design do the following.
1. Create your design and convert it into a PDF
format, you can use the PrimoPDF program that came with the SASS Premier
Scoring & Match Management System or if you have Adobe Acrobat use it.
2. When your design is in the
PDF format save it to the C:\sass premier\stage designs directory and give
it a name. “Last Stand” or whatever.
3. Open the Stage Design in the SASS Premier
Scoring & Match Management System and scroll to the bottom of the list, in
the Description section enter the file name you gave your design into the
description of your stage, don’t put in the extension .PDF. The program will automatically assign it a
number.
4. That’s it you’ve added your own design.
Select “Setup New Match”

Click the “Match Setup” button on the main menu. The first prompt will be to clear all previous match information, select “Yes”. If you wish to make a change to a previous setup select “Cancel”, if you want to clear one of the other matches select “No”. When you select “No” you will get a Window that will allow you to select the match you wish to clear.

Selection window for clear a specific
match.
If you select “Yes” all match information will be cleared. Remember clearing previous match information doesn’t affect your master file.
Note: Be sure you have a backup of your data before clearing any previous information.

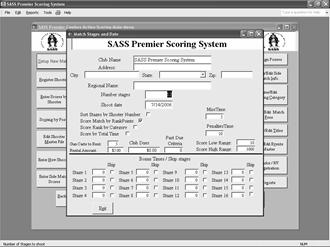
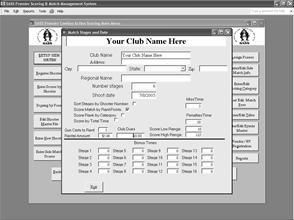
Match setup figure 1:
![]()
![]()
![]()
You can enter a Club Name or any name you wish and it
will appear in the headings of the screens and on the reports. Enter the number of stages you are shooting. Enter date of shoot. Check how you want to score the match, the way you want
to sort the stage score cards if you are assigning posses and printing
stage score sheets. Special packet labels If you have the Aces app you can export /Import data.
Check the Aces box You have the option to setup 4 other matches. If you wish to change the name of the match just click on the match name. You will get a prompt if you wish to change the name
select “Yes”![]()

![]()
![]()
![]()
![]()

![]()
![]()

Match
setup figure 2:

Match setup figure 3:
Enter the name of the new match. Select OK![]()

Match setup figure 4:
Then enter the amount you will be charging for this
match. Select OK

Match
setup figure 5:
The system will place a record in the Events Master for
this match. You should check to be
sure there are no duplicates in the events master.
Match setup figure 6:
Enter the number of stages tab to the Shoot date field you can either enter the match date mmddyyyy or use the dropdown arrow next to the field to bring up a calendar where you can select the date. You can tab to the Club name and enter your Match name if there is one. You can also enter the address, city state and zip, this usually only has to be done once unless you change locations. The club name will appear on all reports and screens. The Miss time (5 seconds), Procedurals (10 seconds) and Minor Safety (10 seconds) are standard but you can change them if yours are different. Click the box next to the way you wish to score your match. (See Match setup figure 1)
You have an option of two types of packet labels, the regular packet labels contains shooters information plus number of dinner tickets if you have setup for dinners in the events master. The special packet label show regular shooters information plus all events that the shooter has signed up for. See packet labels later in this manual. If you wish to use the special packet label you need to check the check box next to Special Packet label.
If your club charges dues you can enter the yearly fees into the Club Dues section.
If you have additional matches you wish to setup just select the check box next to the match and enter the number of stages for that match also check how that match is to be scored. If you wish to change the match name click on the name and you will be prompted if you wish to change the match name, select “Yes” then enter the new name and select OK, you then can enter the match fee you will be charging for this match, select OK. The system will place a record in the Events master for this match, you should check the Event Master section to be sure that this match isn’t already setup, if it is you will want to delete it.
If you are going to print stage score sheets you can determine the order they will print by checking the check box next to how you wish them to be printed”. The system will sort stage score sheets three ways, by shooter number if this box is checked or by Alias if left blank, or you can have them printed randomly. If you select randomly all stages will be printed in the same random order.
If you have the Aces app you can use it for scoring. When the check box is checked there is a button in the Reports Menu to export / Import data to the Aces system. If you select Export you have the option to put the export file in a directory. If you have a DropBox and put it in there when you call up your DropBox on your tablet or phone and select the AcesRegExport.zip the Aces system will import all your data into it. From that point on you will need to check your Aces manual on how to use Aces.
You will want to setup how you will be scoring your Stage DQ, Match DQ and DNF.


Match DQ’s are usually scored as 999.99, Stage DQ’s as 999.90 and DNF as 999.00 enter these scores into the appropriate boxes. When scoring there are check boxes for match DQ, Stage DQ and DNF when you select one of these the scores you enter here will show up.
You can also choose to score Stage DQ by number of shots X 5 plus a number of seconds, click on the description “Score Stage etc”, if you have more than the main match setup you will get a window to select the match you wish to enter the number of shots. Enter the number of shots for each stage, and then enter the number seconds you wish to add. When you select Stage DQ when scoring a stage the system will take the number of shots X 5 seconds and add the number of seconds you entered and place that time in the raw time. 2): You can select the “Score Stage DQ by slowest time + a number of seconds. When you check the Stage DQ check box on the score sheet the program will place a 999.00 into the raw time for that shooter, when you select update scores the program will find the slowest time for that stage and place that time + the number of seconds you select to add into the raw time. This last method is best used when scoring by raw time.
If any stages have a bonus you Select the tab for the
match that you want an enter the bonus amount in
the box next to the stage. There is a 5 second bonus in stage 3. If a stage is to be eliminated from the match you can
place a check in the Skip box for that stage and the system will place 0 in
all times and that stage will not be tallied in the match. You can also place the stage design number that you are
using for this stage.![]()


Those stages that have bonuses place the time of the bonus in the appropriate stage box. When scoring you will find a bonus area for the stages that you have setup with a bonus time, the score keeper can just enter a one in the box and the bonus time will be placed in the bonus area. The bonus time you enter in the setup will be multiplied by the number you enter in the bonus area. If you have different times for bonuses then you could enter a 1 in the setup and if the bonus was 4 you could enter a 4 in the bonus of the scoring or if it was 6 you could enter a 6. This gives the bonus area a much wider range of scores. When score keepers are entering scores only the stage that has the bonus will be displayed on the screen.
The scoring program can also have bonuses for your other matches. Select the tab with the name of your match and enter your stage bonuses. All additional matches have 12 bonus stages except the third match can score up to 18 bonus stages.

Note: Skip information is only for
the main match.
NOTE: Don’t place a check in the check box next to the bonus that check box is used to eliminate a stage from the match.
If a stage is to be eliminated from the match you can place a check in the Skip box for that stage and the system will place a 0 in all times for that stage and the stage will not be tallied in the match.
Why would you want to eliminate a stage? Answer: You may need to eliminate a stage if weather on the last day of shooting is so bad that you are not able to finish shooting and you will eliminate those stages that some shooters were unable to complete.
Stage # is the area where if you have used the stage designs that come with the system you can enter its stage number next to the stage where it is shot. By doing this the scoring system will keep track of the fastest time, shooter and the date for that stage #.
If you have names for your stages you can enter them
into the program and the stage name will print on the Stage Posse
sheets. To enter your stage names
check the box next to the “Add Stage Names”![]()

If you wish to add stage names to your stages instead of saying bay 1 or pit 1, check the box next to “Add Stage Names this will bring up a form where you can enter the names of your stages.
There is room for 16 stages. Just type in the stage name and that name
will print on the stage score sheets.![]()

When you first setup your system you can enter a low and
high score range. ![]()

You can also set up a low and high range for scores. When entering shooters score if the score doesn’t fall within this range you will get a warning message prompting you to check the score. This will eliminate entering an overly high or low score and not catching it.
When printing stage posse sheets there are many options that will allow you to print odd and even posse on different color paper, you can print posse 100 and up separately from your regular posse. These options are used for large matches that require two weekends to complete the match, EOT is a good example. The program doesn’t show these options as a default you will only have one option and that is to re-print an individual posse. If you wish to have the options for printing all special features you must place “YES” in the Special stage score prints area of the Match Setup.
If you are charging a cancellation fee for shooters that cancel from the match, you will enter that fee here. This is usually only done for Annual or Regional matches.
Cancellation Fee Special Stage Score Print![]()

Note: It is a good idea to wait until just before starting a new match to clear the previous match information. This will allow you to go back and reprint scores or get other information between matches. When clearing for a new match your shooters master file is not cleared, all shooters are still in your system only scoring information is cleared.
Match information is saved in a history file when you clear match scores. If you are only clearing one of the other matches you should do a backup first, see backup and restore later in the manual.
Special note
about the reports that merge data into MS Word.
The reports that merge data to MS Word extract data to a special file located in the C:\cowboyextracts directory, the program will then start MS Word and bring the merge template on the screen. That’s as far as the program will go, you will have to do the rest of the merge manually. What this means is you will have to go to the Word menu bar and select Tools, then select the Letter and Mailing (this may be different with the different versions of Word) you can then continue with the merge. The templates have been setup to know where the file is located and will merge the data into the template. You can them print the reports. If you’re not sure how to do the mail merge please check the MS Word help.
When you finish printing your special merge report and exiting, MS Word will prompt to save the document DO NOT SAVE the document.
The system comes with a Shooters Information Sheet that can be
printed. This sheet contains all the
information for the shooter to fill out.
Select the Reports Menu and then Special reports, Select Shooters
Information Sheet, you can use standard windows print commands to select your
printer and the number of copies you wish to print. Have your new shooters fill out one of these
it will be easier to enter the information into the program. There is also a
“Shooters info and release form” that is in the Special reports section of the
Reports menu. When printing the
“Shooters info and release form” you will have the option to print the release
form filled out for shooters signed up for your main match, this way the
shooters only have to check the information and sign the form.
Click the “Enter New Shooter” button from the Main menu.
Select “Enter New Shooter”
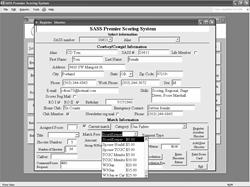
New Shooters Entry Screen.![]()

New Shooter Screen
Enter the shooters SASS# tab to Alias, continue entering information about
the shooter. When finished you can exit
or select “Add new shooter” from this screen.
You can leave the Match information blank until you are ready to start
registering shooters for a match. If the shooter doesn’t have a SASS# leave it blank and finish entering all shooters
information. When you leave this screen
you will be prompted “No SASS number entered.
Let system assign number? Yes No
Cancel” If you select “Yes” the system will assign a SASS number starting with
800000. If you select “No”, you will have to enter a SASS number. To Exit without saving current shooters
information click the “Cancel”. The SASS
number is the main key to the shooter.
You can search by Alias and find the shooter but the main key is the
SASS number. If the shooter doesn’t have
an Alias you will still need to enter something, you can enter the shooters
first name. The system requires both SASS
# and an Alias.
It is important that you enter the shooters sex (M or F) and the shooters state code. If you don’t have the state code there is one in the state setup for a NoState code, the state code is used for regional and state matches where you will need to print reports for your state or regional winners. When you select to print the Top Cowboy and Cowgirl shooters if the system doesn’t have the sex filled in they will not show up on the report.
You can also assign family members, select Family Mbr drop down arrow and select the family member (Note the family member must be in your database) this will help you when assigning posses to know which are part of a family so you can assign them the same posse.
 If
you decide to register a shooter for one of your matches at this time, select
the tab for that match then check the check box next to the match tab to the
Category and select the shooters category.
Tab to the Match fees field and select the fee for this match. If you
are running a Warm up match also and the shooter has signed up for it select
the tab for the Warm Up Match, check the box next to
the Warm Up Match tab and enter the category.
If your shooter wishes to posse up with someone, select the Posse with
drop down and type in the alias the shooters wishes to posse with. If the Alias is in the system their name will
show up in the drop down list, press enter or tab and the shooters name will
show up in the Posse Request area of the form.
If
you decide to register a shooter for one of your matches at this time, select
the tab for that match then check the check box next to the match tab to the
Category and select the shooters category.
Tab to the Match fees field and select the fee for this match. If you
are running a Warm up match also and the shooter has signed up for it select
the tab for the Warm Up Match, check the box next to
the Warm Up Match tab and enter the category.
If your shooter wishes to posse up with someone, select the Posse with
drop down and type in the alias the shooters wishes to posse with. If the Alias is in the system their name will
show up in the drop down list, press enter or tab and the shooters name will
show up in the Posse Request area of the form.

When you selected the Main Match Fee you should enter the payment type (Chk, Cash etc) you should also enter the amount of the payment, if the amount of the payment is more than the Total/W Extras then the shooter sent in more money than required. However if you haven’t entered the extras that the shooter has signed up for you will need to do this.
![]() You
will also want to select any events that the shooter has signed up for, EX:
Friday Night Dinner etc. You select
“Enter Shooters Extras” select any extras that the shooter signed up for on their
registration form. When you return to
the main screen the Bal Due should be 0 if not then
the shooters either owes you money or you owe the shooter a refund.
You
will also want to select any events that the shooter has signed up for, EX:
Friday Night Dinner etc. You select
“Enter Shooters Extras” select any extras that the shooter signed up for on their
registration form. When you return to
the main screen the Bal Due should be 0 if not then
the shooters either owes you money or you owe the shooter a refund.
If you select one of the additional matches Warm Up, Wild Bunch etc when you select the “Shooters Extras” you will notice that there is an entry for that match entered already.

Besides a shooter number the system also assigns a group number starting at 4000, this number will be placed in the front of the Posse Request section, if you have entered anything into the Posse Request the number will be placed in front. This number is used to group shooters that register at the same time, it will be helpful for large matches when you start assigning posses. Here’s how to use this number; say you have a family that registers, you register the first shooter of the group, and select the shooters they wish to posse with by select them from the “Posse with” dropdown list, just select the shooter and press enter that shooter will be placed in the Posse Request section, you can continuing selecting shooters they wish to posse with. When you register the second shooter of the group place a check in the check box labeled Group with previous shooter. The system will place the same number in the Posse Request section as the previous shooter. When you get ready to assign posse the posse assignment screen has an option to sort by comments which will sort all those with the same number together making it easy to assign them to the same posse.
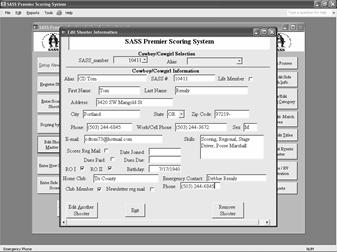
When you need to edit shooters information you select “Edit Shooter
Master File” if you only want to edit the club members select “Yes” to the
first prompt. You select the shooter
either by SASS # or by their Alias, when the information is on the screen you
can change any of the information. If
you are going to change the SASS# or Alias, change it in the “Cowboy/Cowgirl
section not the Selection section.
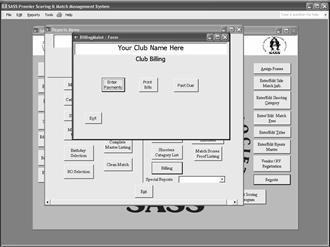
The system has a section for club billing, billing is done on the
anniversary of the shooter joining the club.
You can enter a Date Joined the system will enter a Dues Due date as
soon as you tab into that field that is one year from the date joined. When entering shooters that have a joined
date from a previous year you should change the Dues Due date
to the year that the next dues are due.
At some point you will need to remove a shooter from the program. This can be done by selecting the “Edit
Shooter Master File” from the Main menu.
Enter the Shooters SASS number or tab to the Alias and enter shooters
Alias, when shooters information is on the screen select “Remove shooter from
system”. You will be prompted to verify
that you do want to remove this shooter.
Select “Yes” if you are sure. All
shooters information plus all shooters history will be removed from the system. Don’t use this to remove a shooter from a
match there is another way to do that.
Edit Shooter Master File![]()

Enter Shooters SASS# If the shooter has an e-mail address you can double
click it and your e-mail processor will start, you can just enter your
subject and message. All information regarding the shooter is displayed. If you are using the club billing section
of the program you will notice the dues due and dues paid areas will be
filled in. Learn more about club
billing later.![]()
![]()
![]()
![]()
Editing a shooter.
Prompt to verify removing of shooter.![]()
Select to Register Shooter for Match.
![]()

When you setup a new match the system will clear all scoring information from the previous match. You will need to register the shooters for your main match or other matches. All shooters information is in the shooters database, you will only need to select the main match button to register the shooter.
Click the “Register Shooter” button on the main menu; this brings up the registration screen.
Enter the Shooters SASS# or Tab and enter Alias.


Enter the cowboy/cowgirl SASS number, press either the tab or enter key. If the shooter is in your database the shooter information will display on the screen. If the SASS number is not on file an error message will display “SASS number not on file”, press OK. You should try looking up the shooter by their Alias first before just adding the shooter, tab over to the Alias field and type in the shooters Alias. If shooter is not there you will then have to enter them as new. Click the “Add New Shooter” button; enter all shooter information plus the register information. See Entering New Shooter.
Shooters information area
![]()

When shooter displays on the screen check with the shooter or their registration form to see if the information you have is correct. If you need to change information click on the field you wish to change and make the appropriate change. If you need to change the SASS# or Alias do that in the “Cowboy/Cowgirl information” section of the screen, don’t try and change it in the “Select information” section.
Click the Current Match Check the Category Match Fees selection.


Click the “Main match” this will place a check mark in the Main match box. Tab over to the Category, the category that the shooter usually shoots will be displayed, if no category use the down arrow and select the shooters category. You can also type the first character and the drop down window will display the category. Example if you wish to select Frontiersman you could type “F” this will bring up Frontiersman, you can then just press enter. If you want Frontier Cartridge type “F” this brings up Frontiersman you can click the down arrow and find Frontier Cartridge and select it.
If you wish you can print a shooters score card by selecting the “Print score card”. Your score card will have the number of stages you are shooting. You can cut the cards into sections of just leave it. I find that cutting them into groups allows you to pickup cards as they are completed and get scores entered ahead of time so when the last cards come in you only have a few shooters to score.
If the shooter has requested to shoot with other
shooters you can select them from a dropdown list. In the Posse with area start typing the
alias and the dropdown list will jump to the shooter, when you have the
correct shooter just press the enter key and the shooter will be placed in
Posse Request section. Just continue
entering requested shooters and they will continue to be added to the Posse
Request.

Besides a shooter number the system also assign a group number starting at 4000, this number will be placed in the front of the Posse Request section, if you have entered any requested posse assign with into the Posse Request the number will be placed in front of your request. This number is used to group shooters that register at the same time, it will helpful for large matches when you start assigning posses. Here’s how to use this number; say you have a family that registers, you register the first shooter of the group, and you can add who they want to posse within the comments section. When you register the second shooter of the group place a check in the check box labeled Group with previous shooter. The system will place the same number in the comments section as the previous shooter. When you get ready to assign posse the posse assignment screen has an option to sort by comments which will sort all those with the same number together making it easy to assign them to the same posse.
Note: If you change the category that comes up, the new category will show up the next time you register this shooter.
Continue registering shooters. You can see how many shooters are registered in the “number of shooters”. After all shooters are registered you can wait until score sheets start coming in to start entering the match scores
Display number of shooters. This gives your Match Director an idea of
the number of posses to setup.![]()
In the “Match Information” section there are 6 tabs, tab 1 is Main Match and will display when you bring up a shooter, if you wish to register a shooter for one of the additional matches just select the tab for the appropriate match. If the shooter is already registered for one of the extra matches tab will have an REG in it.
You can enter your Posse leaders and the Posse they are going to run. Click the “Title” drop down box and select the Posse Leader, then tab over to the Posse and enter their posse number. You can also have the system assign posse numbers to the shooters. See section Assign Posse later.
Select the Match Fees drop down box and select the fee you are charging. This is not a mandatory field so it’s not necessary when registering a shooter. You may find it helpful as you will be able to print a Match Registration report that will show how much money was taken in for the match. It’s a good checks and balance report. The match fees are another area where you can enter the description and fees you wish to use. This is done from the main menu under “Edit/Enter Match Fees”.
If you have setup match fees you will want to select the
fee that is associated with the shooter, using match fees will help you
control the money that is coming in.


When you have entered the registration match fee you can enter the amount the shooter has sent into the box Payment Amt. when you enter this amount the Bal due will display an amount if it is zero then everything is in balance. If you have events that the shooter has signed up for the balance due may be a credit showing a dollar figure that may total to the events selected. When you select Enter shooters extras and select those events that the shooter has signed up for and return to the registration screen the total due should be zero, if for any reason there is a credit then the shooter sent in more money than required, if the total due is a debit then the shooter still owes money. There is a payment registration report located in the reports section of the program.
After you have registered all shooters you can run a Match registration report. If a shooter has a free pass or doesn’t have to pay for the shoot you still have to register the shooter. You can select the match fee and put a 0.0 in the dollar amount or a better way is to setup a match entry fee with a 0.0 amount and a description. On the registration report any shooter that has a zero amount will be flagged with ***** in the right hand column of the report. You can enter information in the Payment type field. This field can be used for check # or other information, for regional or state matches this could be a credit card number if the shooter uses that to pay registration.
When you are finished registering a shooter you have the option to print a score card. If you have your printer close at hand the system will print out a shooters score card.
Only shooters that have been registered and have the
current match checked will show up in the scoring section of the program.
You are bound to have cancellations from your match. There are a couple of ways to cancel a shooter.
1. Bring up the register shooter screen, enter the SASS# or Alias of the shooter that wishes to cancel and uncheck the Main match box.
When you uncheck the current match box you get a prompt
warning you that this will remove the shooter from the current match. If that is what you want just press
OK. That’s it all information
relating to the shooter is remove from the current match.

This method cancels the shooter from the Main match but will leave no audit trail If the shooter has signed up for multiple shoots you will need to uncheck each match the shooter has signed up for; if you need an audit trail you should use method 2.
2. The second way is to use the cancellation button on the registration screen. If you wish to have a cancellation fee associated with the cancellation you must have setup a cancellation fee in the match setup section.
 Again
you bring up the register shooter screen and enter the SASS# or Alias of the
shooter at the bottom of the screen click the “Cancellation” button, you will
again get a prompt that this will remove the shooter from the current
match. If correct select “Yes”.
Again
you bring up the register shooter screen and enter the SASS# or Alias of the
shooter at the bottom of the screen click the “Cancellation” button, you will
again get a prompt that this will remove the shooter from the current
match. If correct select “Yes”.

Prompt to charge a cancellation fee.
![]()

Once you have selected “Yes” the shooter is removed from the main match and all other match information pertaining to the matches is also removed (any events that shooter may have signed up for are also removed).
You can print a cancellation report
that will show those shooters cancelled and the amount of money that is to be
returned. In the Reports menu select the
“Special Reports” dropdown list and select the “Cancellation report.

Your cancellation report will display on the screen.

The report shows Alias and the shooters real name and address also the Refundable amount and the cancellation fee and total that is to be refunded. Because you have the option of entering a beginning and ending date you can run this report once a week or once a month or just once to show the refunds.
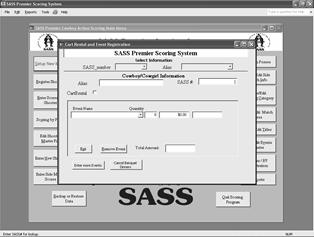
Conventioneers are individuals that want to be part of the goings on, dress up in western cloths wear their guns. These cowboys/cowgirls don’t shoot in the main matches but want to fit in with the group. In order for an individual to be allowed to participate, (wear guns etc.) they have to be part of the overall match (except for shooting). They will sign a release form and everything that a regular match participant does. These conventioneers are usually charged a fee, standard charge is somewhere around $35.00. You can track this information in the Events area of the Scoring Program. In order to track Conventioneers do the following. Select “Register Shooter” from the main menu. Enter the SASS# or Alias then select the “Conventioneer/Non Shooter” tab.
Select the conventioneer check box. In the conventioneer title select from
the dropdown list. Be sure to enter
a Conventioneer or Non Shooter into the Events Master with the fee you will
be charging.

Call up the conventioneer in the Register Shooter screen, select the Conventioneer/Non
Shooter tab and check the conventioneer check box. The Events report will list
these individuals and the amount of money you have collected. If you have non
shooters you register them the same way on select the Non Shooter check
box. Remember Conventioneers and Non
shooters can sign up for Events (shooters extras).
During your annual matches and any other matches that you have Special Events you can track this information. Select “Enter shooters extras” from the Registration screen.
Select “Enter Shooters Extras”.
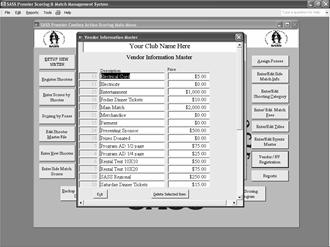
Before you can enter the detail event information for a shooter you will need to have setup your events. Select “Events Master” from the main menu, the program comes with some sample events already setup. Some examples of events are Banquets, RO Training classes etc. You can set up any type of event you wish to track.
Example of Events master setup screen.
![]()

Events drop down window 
Select the Enter Shooters Extras brings up the Extras screen and allows you to select from the drop down window the extra the shooter has selected. Tab to the next field the system defaults to a 1 but you can change it, the system will display the amount for that event.
The shooters registration screen will tally up the money from the match fees and any extras you have added and display them in the Total W/Extras box. This will help you balance your money received from the shooter.
Entering the number of units the system displays the
amount and a running total.![]()
![]()

All Event information entered for a shooter will show up on the shooters confirmation letter, you can also print an Event report from the Reports Menu.
If your shooter has registered for a Wild Bunch, Warm Up, Plainsman or Black Powder match you do not need to enter those at this time because when you registered your shooter you selected the registration fees from the events log and they have already been entered.
Note Other Uses for
Events:
You can set up Events such as Banquets, R.O. class training, Camping Fees, RV
rental spaces or special mounted events.
The report printed will divide the Events up in sections and will give
Shooters Alias, Event and amounts. You may find other ways to use the Events
section. When printing confirmation letters the events will print on an
individual basis. This way when you send
out your confirmation letter you can let the shooter know which special events
they may have signed up for.
You can print an Events report any time.
When all shooters are registered you can run the posse assignment. Click the “Assign Posse” button on the main menu.
You then need to select which match you will be assigning posses for\
For small matches it is sometimes easier to just assign the posse from a posse signup sheet. But for large matches such as Regional and State matches you may want to use some of the other features of the SASS Premier Scoring system to help you.
You can enter the posse assignments manually or choose to let the computer assign them for you, any shooters that you entered with a posse number during registration will display.
When assigning manually you have some options that will help you. You can sort by any of the columns just by clicking on the sunken heading at the top of the column. Using the group number can help you put shooters together. You can also search any column for a shooter. Example: If you want to look in the comment field (posse with) Double click on the Alias you want to search for then press the Ctrl F key this will bring up a search box the Alias in the Find What box, click on the down arrow of the Match and select Any part of the field then just select Find Next. This will walk you through and high light the Alias you are looking for. This can help when you are looking to see all shooters that want to posse with this shooter.
Double click on the Alias you want to search for.

Press the Ctrl and the F key this will bring up the
search box with the Alias in the Find What box. Click the down arrow of the Match and
select “Any part of the field” then just click the Find Next button.![]()


To allow the computer to assign posses select the “Let computer assign posse” button. The system will inform you of the number of shooters that are registered and prompt you to enter the number of posses you want. The program will randomly assign posse numbers to the shooters.
For those shooters who have a shoot thru, give these shooters posse # 99 the system will place them on a separate sheet.
You can assign those shooters that will be shooting a pre match posse numbers 101 and above. The pre match is usually shot the week end before the main match, shooters that shoot these matches are usually the ROs and those shooters that will be helping with the main match. They are still part of the main match and will be scored with the main match but only shoot the match prior to the main match. When printing the stage sheets you have the option to print posse 101 and above separately. Note: you will need to have the “Yes” in the Special stage card print of the Match Setup section.
After the program has assigned numbers you can preview the posse report. Click on the “Preview Posse report” button move the preview posse report to the side (click on the top blue line and drag to the side) and check how the system assigned posse numbers. If when registering shooters you entered information in the Posse Request field this information displays on the Posse assignment screen. Notice that the system has placed a sequence number in front of your posse request. If you used the Group W/previous check box when registering a shooter those number will be the same. There is a View button at the bottom of the screen that will allow you to sort the assignment screen by either Alias or Posse Request. Select the view by posse request button will place all your groups together making for easy assign groups to the same posse. The column headings that show up as sunken are also sort buttons, click on these and the posse assignment sheet will sort accordingly. Also if you need to look at more information regarding a shooter just double click the shooters name and a shooter information screen will display. You can make some changes at this point.
You will have to go through and probably rearrange some of the shooters, putting those together that have to share guns or want to shoot with their pards, after rearranging some of the posse you can click “Refresh assignments” the posse assignment and report will redisplay again. When you are satisfied with the assignments you can preview the shooting order that stage score sheets will print. The system will print stage score sheets in three sequences Alias (default), Shooter Number or random this will depend on the option you entered in the match setup. See section on “Match Setup”.
If you are having the system sort by shooter number you can change the shooters number on the posse assignment screen to put the shooter in a different order. If you are using the shooters number for some other reason be sure not to duplicate the number, if you don’t use the shooters number you can arrange the shooters number any way you want.
Preview the posse assignment report,
you can move the screens around to you can see both.

Posse Assignment screen with Posse Report
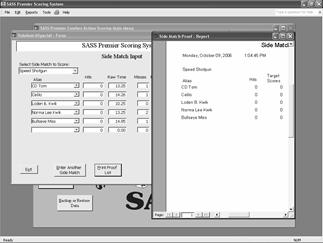
When finished entering a shooters score you can print a
proof list for verification. Notice that stage 3 shows the bonus entry box and bonus
area. This is because you put a bonus amount when you setup your match.![]()
![]()

Screen for entering scores.
Click the “Enter Scores by shooter” from the main menu, and then select the match you are scoring. Enter the shooters SASS number or select the shooter from the list, only those shooters that have been registered will show up. After you have entered all the shooters stages the shooter will be gone from the Unscored list. If a shooter is not registered you will have to register that shooter and then enter the score. If a shooter has a stage DQ you can just click the check box and the program will enter 999.00 into that stage. If the shooter has a Match DQ click the Match DQ check box and if a shooter has a DNF just select the DNF check box.
Enter the shooters time,
misses’, procedurals, Minor Safeties and the bonus if needed, you only need to
enter a 1 in the bonus box the system will multiply that times the bonus you
entered in the bonus section of the match setup. When entering the time you can enter without
any decimal and the system will place the decimal for you. You can use the decimal if you wish but it’s
not necessary. Ex: 34.56 and be entered as 3456, 56.00 can be entered as 56. However
if you want to enter a score of 131.00 you need to enter it as 13100, in fact
anything over 100 seconds that ends in a zero you will have to enter the full
amount. Example: 123.10 will need to be
entered as 12310. You don’t have to
enter the misses’ procedurals or bonuses; you can just enter the time. If you enter the misses’ procedurals or bonus
the computer will compute the score. If you are only going to enter the total time
you can enter it into the raw time field and us the “Down Arrow” to move to the
next raw time field. The “Up and Down Arrow” will skip the misses, procedurals
and bonus check box fields. The Left and
Right arrow along with the tab and enter keys will still move into the misses, procedurals
and bonus fields.
NOTE: When entering misses’, procedurals or bonus if you make a mistake and go back to clear say a miss make sure you enter a zero into the field. If you leave the field blank you will get an error message that you must enter a zero in the field. A blank is not a valid entry when doing the math.
Sometimes you have special scoring needs for a given stage. Example: If you drop the money bag while moving to the next shooting position you get a 5 sec penalty. Because procedurals are setup for a 10 sec time, how would you score this? Answer: set up a bonus for that stage in the “Match Setup” then enter a -1 in the bonus box the system will add that time to the shooters score.
Enter the score for
stage one and either press the enter key, or the tab key to the next
stage. When finished with one shooter
select the “New Score” button and
enter the next shooter. After all shooters have been entered,
click the “Update Scores” button. If you
go back and make changes to the scores you will need to click the “Update Scores”
again.
If you enter the scores as the stages are completed you would enter the first stage, when the next stage comes in you would enter the SASS number and the shooters score would come up. You can then enter the next stage and continue.
Scores can be entered by Stage and Posse. When you assign posse either automatically or manually you can print stage posse sheets. There will be a score sheet printer for each posse and every stage.
 When
the sheets come in from stages, click the “Score by Posse” from the main menu.
When
the sheets come in from stages, click the “Score by Posse” from the main menu.
![]() Select
the match you are scoring.
Select
the match you are scoring.

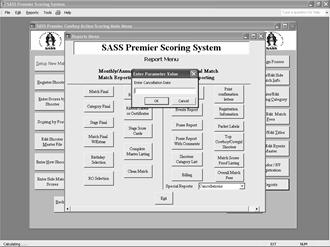
You are prompted to enter the stage you wish to score.

Enter Stage to score screen
Then enter the Posse # press OK or enter.
Then enter the posse you want to score.![]()

Enter Posse to score screen
The posse scoring sheet will display, the scoring sheet on the screen will look like the sheet you printer earlier. Shooters will be in the same order. Enter time, misses, procedurals, minor safeties and any bonuses.
After entering scores select to print the proof list,
you can then give this to a person to check your entries. Notice that there is a bonus section showing on the
screen. This is because stage 3 has
a bonus for that stage.

Posse scoring screen
There is no need to enter the decimal the system will place it for you. Enter 34.56 as 3456, 56.00 can be entered as 56 you can also enter the decimal if you want. However if you want to enter a score of 131.00 you need to enter it as 13100, in fact anything over 100 seconds that end in a zero you will have to enter the full amount. Example: 123.10 will need to be entered as 12310.. When there is a bonus on the stage all you need to do is enter a 1 in the bonus box and the system will place the bonus time you entered in the setting up of the match. There are some cases where you can get a 2 second penalty you can’t put that into the Procedurals portion of the score as it would compute by penalty time. The best way to handle this is to enter a 1 into the bonus when you do the match setup. Then enter a minus -2 in the bonus column, this will then add that amount back into the final score. If you have more than one bonus on a stage just add the bonuses together.
When finished with one stage click “Next
Posse” and enter the “Staged to be scored” press Ok and enter the Posse # press
Ok. When
finished with all posse and stages click the “Update Scores”
When you enter “Update Scores” if you get a message that all shooters are not scored. This means that a shooter or shooters are missing some scores. The best way to find these shooters is to go to the “Score by individual” select the match you were scoring and look in the UnScored List this should show the shooter or shooters that are missing scores. Select the shooter and enter the scores for the missing stage or stages.
Scoring a Stage DQ or Match DQ:
The
program has three different ways to score a DQ.
In the Match Setup section you have the options of Scoring Stage DQ by
slowest time plus a given number of seconds. This is best used when scoring by
Total Time. The next option is to score a Stage DQ by taking the number of
targets for that stage X 5 seconds and adding a given number of seconds. The final way is to just use the standard
999.00 for a DNF and 999.90 for a Stage DQ. When you setup the Match Setup you entered
these times into the Stage DQ/Match DQ section.
Now when you select the check box for the given DQ the appropriate time
will be placed in the raw time.
A Match DQ is a 999.99 when you click the check box under the heading Match DQ the program will put the 999.99 into all that shooters scores.


Exit existing score
If you have entered a score and need to edit shooters score click the “Enter Scores by shooter” button. Again you can enter the SASS number of the shooter and the shooters score will be displayed on the screen. All you need to do is select the field you wish to edit and change that score. When finished click the “Update Scores” button and then the Exit button.
You can also edit scores by select “Scoring by Posse” and select the match, then select the stage and posse of the shooter you wish to edit.
Setting up for an Annual match.
You should already be doing backups of your matches. If not you should be and to make it easy here’s what you do.
The first thing you should do is create folders on your hard drive or a jump drive to store your backup files. This can easily be done using Windows® Explorer. Create a folder called Monthly Shoots (or something like that). Then within that folder create a folder for each of your monthly matches 100209, 091609 etc. you can also create a new folder when you are in the scoring program but it is quicker if those folders are already created.
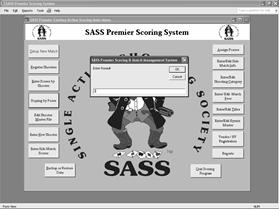
Select the Backup or Restore from the main program menu
Enter a 1 for backup and press Ok.![]()

Enter a 1 for backup.
Click the + next to the folder.![]()

The program will point to the c:\sass premier directory, you can press the + next to the directory to open it up.
When folder is selected just press the Ok.![]()
With the folder open you can select the folder for your current months match and when it is selected just press the Ok.
Now you should also set up a folder for your Annual match. You can put the folder in the same directory but give it a name Annual Match 2009, and within that folder create three more folders, if your match dates are June 21 – 23 you could make folders registration1, registration2, 062109, 062209, 062309, Final.
Now that all the folders are created, remember you can create more folders directly from the backup section of the program if you need additional ones, you are now ready.
Adding extras and tracking information (dinner
tickets, RO Classes etc.)
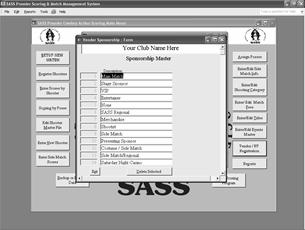
A big feature of the scoring system is being able to track event information you are having at your annual match. You can setup your banquet so you will be able to print tickets, setup any classes you are holding RO I, RO II. Special warm up matches etc. Not only will the scoring system tell you how many are attending but will also track the money.
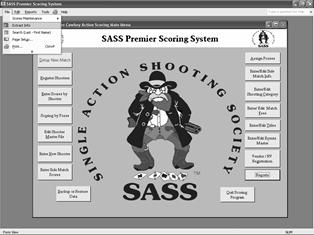
Setting up these events is very simple, from the main menu just select the “Enter/Edit Events Master”
Select “Enter/Edit Events Master![]()
In the Events screen you can modify the entries that are there or delete them and start from scratch. Just enter a description of the event and the dollar figure you want to charge and if event has a date enter it, the date is mandatory for you banquet tickets. One thing to remember when you are entering for your Banquet or Dinner one of those two words must be somewhere in the description. Ex: Saturday Banquet, Friday Night Dinner. Saturday Night Dinner (Salmon) Saturday Night Dinner (Steak) etc.

Another feature of the event master is that you can extract it to an excel spread sheet, you’ll find this in the special extract section of the program. There are check boxes next to the events that allow you to select if you wish this event to be eliminated from your confirmation and registration letters. The check box labeled extract to excel is for those events you want to extract.
Changing match fees, adding new fees.
Another thing you will need to change is your match fees. Select “Main Match fees” from the main menu
Select “Enter/Edit Match Fees.![]()

This brings up the Match fee screen.
Enter description and fee you will be charging.![]()

You normally have your main match fee, spouse, junior but you may want to enter other fees, maybe you have a Buckaroo fee, or a comp fee, all these fees will show up on your registration report. These fees are for the Main Match only your other match fees are entered through the Event master.
Your fees for the other matches
Warm up, Wild Bunch these fees are entered into the Events Master. By doing it this way you can setup Warm up matches starting at different times. Warm UP match
When you print the registration form and shooters confirmation letters part of those are the events you have setup. On the registration form the events show up so the shooter can check which events they wish to participate in. On the confirmation letter it shows the shooter which events they have signed up for. If you want to track something that you don’t want to show up on these place a check in the box next labeled “Exempt from extras report” to that event.
Sending out registration forms.
You’ve put an ad in the Chronicle, but how about sending out your registration form to all the shooters in your database. Your database contains all those shooters that have shot at your club before and you might as well make sure they get a registration form.
There are three sample registration forms included with the SASS Premier program, these templates are located in the C:\sass premier directory with the name registration1.doc, registration2.doc and registration3.doc. Template 1 is for sending out via e-mail to shooters with an e-mail address, template 2 is for sending out regular mail and 3 can be used for hand-outs. Remember you may have to change all three if you plan to use all of the templates. You can make up one and copy the data to the other two. You will notice that the last page of the registration letter is setup for extras, you should enter your events before you do your registration forms.
To run the registration form just select “Reports” from the main menu the “Special Reports” and “Registration form” select “Yes” to “Print registration form”.
Select Registration form from the Special reports menu.
Select Yes to prompt.

You can then enter the registration form number you wish to use, remember there are three types of registration templates registration1.doc is setup for e-mail shooters, registration2.doc is for those shooters that don’t have an e-mail address and registration3.doc is a fill-in form. Both registration1 and 2 are pre filled forms with the data from your database. After you have selected your form you have the option to select by states or to all states. If you select by state you will get a state selection screen

Place a check into the states you want to select.
MS Word will start with the template you selected all you need to do is the mail merge and then either e-mail out the registration letters or print them depending on which template you selected.
I have setup an intro letter first and then the actual form, the last page is the extras that you have setup in your event master. The events page will hold 40 special events if you have more than that please let me know and I’ll expand it.
You now need to do the actual merge, because registration1 was selected, I can now e-mail directly from word.
Select the e-mail icon on the Word menu bar.
Place a subject in the Subject line “Annual Match Registration” and give it the mail format, use either HTML or Attachment, then select OK.
When finished close Word, (be sure you don’t save the registration1.doc form or you will replace the template with the merged document)
You can now run the registration form again using the number 2 document to get those shooters that don’t have an e-mail address. When that is finished you could run the number 3 to use for handouts.
The program has a special e-mail processing section that will allow you to send out special notices to groups of shooters or all shooters in your database. This is handy when you want to send out a standard notice regarding your annual match. You can also use this to attach registration forms and other flyers that you wish your shooters to have.
Note: This option will only work if you have MS Outlook setup.
Special e-mail processing is located in the Reports menu under the Special reports dropdown list.
You should have MS Outlook up and running when you do this option.
Your next screen has three steps,
Step 1: Create Email groupings
You will notice that there is a selection button on the bottom of the screen to Check E-Mail addresses, the first time you use the Special Email you should run this option. MS Outlook has a unique feature that if an address is formatted correctly then it will not send anything out. This will check all shooters with an email address to see if it’s formatted correctly. If the system finds an incorrect email address it will display the Alias and SASS# for the shooter. At this point you should write down the SASS# and select Ok, the program will continue to check, continue writing down those shooters with invalid email address. When finished you should exit the Special email section and go back and edit those shooters with invalid email addresses. When finished go back to the Special Email and do another check. I’ve tried to enter all valid email extension ie .com, .net etc if I have forgot some just select Ok to the invalid email message.
Note: Please let me know any extension that I have forgotten. When you enter a new shooter or edit an existing shooter the program will also check the email address.
Now that we have corrected all email addresses you can select your groupings. You can sort each column by clicking on the heading. Also in Step 2 there are groupings already setup so you may not have to create your own group here.
Step 2: Email detail input


This is where you fill in the Email to: Subject: and Message. If you read the instructions you will notice that there are two places where you can place attachments. If you have a single attachment you can place it in the C:\cowboyextracts directory and put the name of the attachment in the Attachment Name box be sure to include the extension .pdf, .doc. If you have more than one attachment you place them in a directory called C:\attachments all documents in the attachments directory will be attached to the email. You can also place your single document into this directory but be sure to delete any documents you may have in that directory. You can now put how you want the email to be signed.
You will notice many group options you can only select one option at a time. If you have setup a grouping in step 1 then put a check next to that grouping, or select one of the pre setup groupings. When finished just exit.
Step 3: Special Emailing:
When you select step 3 you will get a warning about using MS Outlook, if you don’t have it setup don’t run step 3.
The program will build a Bcc.. of 95 shooters then send that group out. I only send 95 out at a time because MS Outlook sometimes has a problem with more than that in the Bcc section. The program will place a message to wait for each group to be sent. You will get a message when all emails are sent.

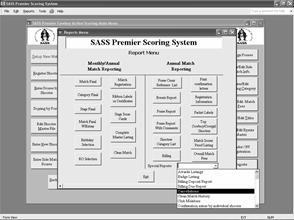
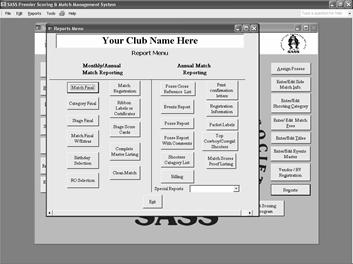
Reports Menu
The system will print your stage score sheets. The logo that appears on the score sheet is the standard SASS logo, you can have your own logo appear on these sheets by placing your logo in the C:\SASS Premier directory and giving it the name SSheetlogo.jpg make sure your logo is in the jpg format. The score sheets are in shooters alias order by default or by shooter number if you have checked the check box in the Match setup screen. Mention to your posse leaders that the order of the score sheets should not be changed. It doesn’t matter the order that the shooters shoot but don’t change the order on the sheet. The system will leave a couple of blank lines at the bottom of each sheet for you to write in a shooter if need be.
You have the option of printing odd and even posses on different color paper. The system will prompt you if you wish to print different color paper for posses. If you select “Yes” you will be prompted to mount paper for odd number posses, when they are finished you will be prompted to mount paper for even number posses. You also have the option of printing posse 100 and above separately, use these posse numbers for pre match shooters, they still are part of the main match only being shot at an earlier time. This is used for your ROs’ and helpers that usually shot the match the weekend before the main match. Posse 99 is used for shoot-thru, these stage sheets will print after all the odd and even posses have been printed. There is a prompt to change paper for Posse 99.
When you are finished printing score sheets you can place them in a binder and give them to your posse leaders. When entering your scores after shoot is complete the posse scoring screen will be displayed in the same order as the printed score sheets.
When finished with entering all the stages and updating the scores you can print the stage results. Click the “Reports” button you can then select Match final or other reports. If you want you can print ribbon labels or certificates. The ribbon labels are standard Avery labels # 5167. There are five (5) standard certificates that come with the program (these will only work if you have MS Word installed on your system), see samples at back of manual.
When you click the “Ribbon Labels or Certificate” button follow the prompts, click “Yes” to print labels or “No” to select certificates. If selecting certificates you will be prompted to print a clean match certificate, if you enter “No” you will be prompted to enter the certificate number you wish to print. The system comes with a set of certificates located in the C:\SASS Premier directory with names Certificate1, Certificate2 etc. The next prompt will be to enter the depth of places you wish to print. The program will extract the information into a Word merge file. After the extract Word will start and the ribbon or certificate template will display. Select Mail merge from the Tools drop down menu then select Merge the data with the document. Your ribbon labels or certificate will display, all you need to do is print them. If you decide to use another style of labels you can set up your own template just be sure you save it under the name “ribbonlabels”. You can also set up your own certificates and merge the data into them. Name your certificates as follows: certificate1, certificate2 or certificate3.
Note: If you have something else to print, e-mail me and I’ll see if I can incorporate that into your system. You can also setup your own certificate just be sure to name them as follows certificate1 the number can be any number you wish. There is no space between certificate and the number. When you select to print certificates the system will prompt you for the certificate number, just enter the number of the certificate.
Printing Confirmation letters:
The SASS Premier Match Management & Scoring System will print confirmation letters if you wish. There are sample letters in the C:\SASS Premier directory that can be modified to meet your clubs specific format. When you select to print confirmation letters you will be prompted to enter the letter number, 1 or 2.
The information extracted for letters contain the SASS Number, Posse, and Alias, Shooting Category, Name, Shooter number and Number of dinner tickets purchased. You could set up multiple letters all you would have to do is change the number at the end of the name. Don’t leave any spaces between letter and the number. Ex Confirmation letter1.doc or Confirmation letter2.doc. When you select Confirmation Letters from the reports menu, only those shooters who haven’t had a letter sent will be extracted. In order for the system to be able to print the number of dinner tickets purchased you will need to enter that into the Shooters extras area.
When you select to print “Confirmation letters” you will have the option to print all or select an individual. If you follow the prompt and select “No” to print individual letters you will be prompted to enter the shooters SASS#. You will also be prompted to “Select e-mail only? No will select those without e-mail, cancel will select both. When confirmation letters are printed you are prompted “Confirmation successful? Yes will mark as printed, No will not mark” this gives you the chance to not mark these shooters as having the confirmation letters sent, in case you have a printer jam or just want to see how your letter looks. You can also print a confirmation letter report. This report shows all those shooters that you did the confirmation letter.
There are also packet labels you can print; these have the same information that is on the confirmation letters. There are two versions of the packet label.
Special Packet Label: This label has all information including the events that the shooter has signed up for, in order to use this label you must check the Special Packet Label check box in the “Match Setup” screen.
Regular Packet Label: This label doesn’t show the events, it will show the number of dinner tickets but doesn’t have all the events.
You can attach these to the shooters packet. When printing packet labels all registered shooters and any conventioneers will print.
The labels you can use are standard 1 1/3 X 4” labels or use Avery 8162 or 5162 labels.
Just select the “Reports Menu” from the Main Menu, and
then select “Packet Labels”

All reports except Score Cards, when selected will print on the screen first you can then select Print from File menu or select the printer icon.
Printing Banquet/Dinner tickets
To print Banquet/Dinner tickets you select the “Print Dinner Tickets” from the “Reports” menu under “Special Reports”. There are a couple of special things that need to be setup before Tickets will print. First in the Events Master you must have the word Banquet or Dinner somewhere in the Title. Ex Saturday Night Banquet, Friday Dinner or something like that. When you enter the number of tickets in the shooters extras, if you enter 2 the computer will print out two tickets that have Admit 1 on each ticket. The tickets print out of a Word mail merge and it is set up to use Avery 8376 business card labels. If you have more than one Banquet the system will print tickets for each event, it will print all of one event first and then the other. The name you put in the title will show up on the Ticket (try and keep the title small so it doesn’t wrap on the tickets.).
Printing Personal Score Cards:
You can print Personal Score cards for your shooters. Select “Reports Menu” from the Main Menu and then select “Special Reports”. Look for the Print Personal score cards. When you select this you will be prompted to print all or print an individual. Select “Yes” to print all or “No” to print an individual, if you select “No” you will be prompted to “Enter shooters SASS#”. The program will extract the individual and start Word with the “Personal Score card” template. You just have to do the mail/merge to complete the process and print the score card.
The system can print the shooters badges if you wish. Select “Reports Menu from the Main Menu, then
select “Special Reports” scroll down until you find “Print Shooters Badges” or
you can select the first letter of the selection “P” that will jump you to the
start of the P’s.
There are different badges you can print.
You have a standard set that is included as part of the SASS Premier
scoring system, these have the state flags printed on them and will print on
Avery 5383 “Laser Name Tag Kit” or the standard business card size. You can design your own and use MS Words mail
merge. There is a MS Word template
included with the system, this file is located in the
C:\SASS Premier directory with the name of “Shooters Badges.doc” this file can
be edited so you can setup your own design.
If you wish to divide up your badge printing (different colors for
different category or something like that) there is a selection under “Edit” on
the top Menu bar called “Print Badge Selection”. This will allow you go put a check next to
the shooters you wish to print. After
the first group is printed you can go back and select another group. Each time you print a group the check will be
removed from the badge list. This will
keep the system from reprinting badges once they have been printed.
 Here are some examples of different shooters badges,
if you have a special need I can produce your template for you. There is a small fee $25.00 to create the
badge template for more information please e-mail
Here are some examples of different shooters badges,
if you have a special need I can produce your template for you. There is a small fee $25.00 to create the
badge template for more information please e-mail


Printing Match Directors Guides:
The SASS Match directors guides for Match Design and Match Administration
are available to view and print from the Special reports. These guides are in Adobe Acrobat reader
format “PDF” you can download the reader for free and the Adobe web site.
Printing SASS Shooters Hand Book:
The SASS Shooters Hand Book is available for view and print from the
Special reports section of the Reports menu.
The Hand Book is in the PDF format also.
Printing ROI and ROII course material:
The ROI and ROII course material is available for viewing and printing
from the Special reports section of the Reports menu. This material is in the Adobe Acrobat reader
format PDF. The reader can be downloaded free from the Adobe web side.
Printing
SASS Premier Scoring & Match Management System Manual.
Select print Match Management Manual from the Special Reports section of
the Reports Menu. The manual is in Adobe Acrobat reader format PDF. You can download the reader free from the
Adobe web site.
If you have entered birthdays into the shooters master file you can print
birthday cards for your shooters. In the
reports menu select “Birthday Selection” enter the birthday month 1 for January
the system will print a list of shooters that have birthdays during that month. You are them prompted if you wish to print
birthday cards. If you answer “Yes” you
are again prompted to enter the birthday month.
The SASS Premier Scoring System will extract those cowboys that have
birthdays into a MS Word mail merge file and start MS Word bring up the birthday
card template. This template is called
CowboyDBCard.doc and is located in the C:\SASS Premier directory. If you wish to change the wording you can
modify the sample birthday card. When
the template is up just do the standard MS Word mail merge. The birthday cards print on 8 ½ by 11 paper
and can be folded, taped stamped and mailed.
This is a nice touch and lets the shooters know you are thinking of
them.
There is a special extract section that will allow you to extract
information in many different ways. From
the “File” select “Extract info” this will bring up the following screen
Select Add In from the top menu then under File select
Extract Info

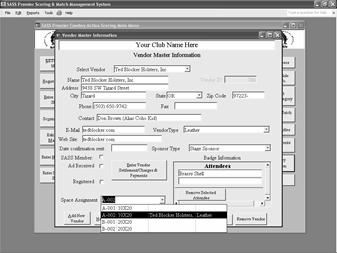
Special
Extract

Select the type of extract you want, make a note of where the file is
being extracted to and the file name. If
you find you need some other extract let me know and I’ll see if it can be
incorporated into the program.

You can use the e-mail extract option from the extract menu to extract those cowboys/cowgirls who have an e-mail address entered into the shooter master file. Select the Extract current e-mail address to select those shooters who were registered for the last shoot.
The next step will take some extra work to get these shooters into your address book. It would be best to be able to delete those shooters from your address book and update with the current shooters. If you are using MS Outlook express as your mailing software this can be accomplished with a little study into the functions of the Address Book and MS Outlook express.
You can also extract all shooters with e-mail address from the File menu and create an address book for all your shooters.
The extract portion of the program will extract the e-mail, Alias, First Name, Last Name, Address, City, State and zip code. This file is in a delimited format and will import directly into your MS Address book. The extract files are located in the C:\CowboyExtracts directory, with the extension .TXT ce-mail.txt is the file for the current match shooters. All-e-mail.txt is the file with all shooters that have e-mail address.
You can extract information for Word mail merging if you wish. From the tools menu select extract for Mail Merge. The merge will consist of SASS number, Alias, First name, Last name, Address, city state and zip. The file will be placed in the C:\CowboyExtracts directory under the name MMShooter.txt. You can then use Word to create a mail merge letter; the mail merge file will contain all shooters in the database.
You can export current match scores to an Excel spread sheet. This can be used to send to your Web site or other uses. From the File menu Select “Extract Shooter info” this will bring up a sub menu select “Current Match stages to Excel”. The files will be located in the C:\cowboyextracts directory with names “Scoring Template MM/DD/YYYY” The scoring template has calculate fields in it, the program will load the template with all the scores from your match including misses, procedurals, minor safeties bonus etc.
To set up side match information you click on the “Side Match info”
Enter side match name.
Select Enter/Edit side match info to setup your side
matches.![]()


Side Match screen
Enter your side matches, there is no need to setup a special side match for cowgirls because the system will take care of this for you. Type in the name of your side match, before you enter the print order it is a good idea to put in all your side matches. If you have a side match for couples be sure to have the word couples in the title somewhere, this is so that when scoring the couples the system will let you enter the both the couples name. When you have done that then go back and put in the print order, the print order is the order you wish the results to print in, this is helpful if you are handing out the awards in a special order.
Side matches usually are scored in two ways:
1. The first time through if the time that counts for awards, you usually have a first time for both cowboys and cowgirls.
2. The shooter can then shoot as many times as they wish for the fastest time.
If the fastest time is a combination of both cowboys and cowboys you need to check the Cowboys & Cowgirls combined box. When printing the results the fastest time will be combined into one group.
When you have entered your side matches master information you can print side match score sheets. In the “Reports” menu under the special reports section you will find a report called “Side Match Score Sheets” this is a MS Word merge document and will merge side match information into each of the sheets, you can do the merge and then print as many copies of each side match as you wish.

In most side matches a shooter can shoot the side match as many times as he/she wishes, but only the first time through counts for side match award, but all times count toward the fastest time. You will notice that the score sheet has a check box for the 1st time, be sure to have the score keepers check this box when the shooter first shoots the side match.
Enter scores into the side match:
Click on the “Enter Side Match Scores” button from the main menu. You now have the option to edit an existing match. Select No, this will bring up a selection window that will allow you to enter scores either by side match or individual. Selecting score by individual only if you want to make changes to an individual shooter otherwise select score by side match.

Side Match entry screen
Select the side match from the drop down list and then select the shooter from the Alias drop down list, you can just type in the Alias and the list will jump to that Alias.
Once the Alias is selected the system will check to see if that shooter has shot that side match before, if not a check will be placed in the “First Time” check box, because the system will do the first time check for you, it may make it easier if you have the person running the side match to enter a start time on the side match score sheets. By doing this you can arrange the score sheets in order by time before entering scores. If you try and check the “First Time” check box and the shooter already has a score entered for that side match you will get a warning and the check will be removed.
When entering times there is no need to put in the decimal as the program will enter it for you. Because times can be very fast in some side matches (less than 10 seconds) you will get the High Low range warning, you can fix this by changing that range in the Match Setup section of the program.
When you have finished entering times for a given side match you should print the “Proof List” and have someone check the scores.
With the proof list in the same order that you entered the shooters it makes it easy to check the scores
When you are finished entering all
the side match scores you can print your match results. In the “Reports” menu under the “Special
reports” select the side match results, you are prompted as to the number of places you wish
to show. This report will print the
results in the print order you setup in the match setup. Within this order the report will be divided
into the First time cowboys and cowgirls, and the Fastest time, this will be
either by cowboys and cowgirls or combined, depending on if you check the
combined check box when setting up the side match. You will also have the option to create a
HTML or PDF file.

Report is with all times for each
shooter, then the fastest
time
The SASS Premier scoring system can keep track of your RV spaces. You can assign spaces to registered shooters or just people that are looking for a place to stay. When setting up your RV spaces you can put the size of the space, whether it has full hookup or just electrical and the rate you are charging. Select Vendor/RV Registration from the Main Menu. Then from the Vendor Main Menu select “RV Space Master”

RV Space Master
The first thing you need to do is setup your spaces. There are a few setup for samples, you can delete these out and setup your own. You only need to setup the Space number, Space Size whether it has electrical or full hookup and the daily rate.
After all spaces are setup you can print a Space Available list. This you can do from the main reports menu (not the vendor reports). Select “Reports Menu” from the main SASS Premier menu, then select “Special Reports” and look for RV reports.

You can assign RV spaces two ways.
Through
Shooters registration.
Through
the RV Space Master.
Two RV entries
![]() Shooters Registration: You first need to setup a RV in the events
master. Select “Enter/Edit Events
Master” from the main SASS Premier menu.
Shooters Registration: You first need to setup a RV in the events
master. Select “Enter/Edit Events
Master” from the main SASS Premier menu.
Setup your RV entries like the ones in the example. With the RV master setup you are now ready to register your shooters for RV spaces.
Register your shooters in the normal way. Select “Register Shooter” from the main SASS Premier menu.
Select the Enter Shooters Extras.

Select the “Enter Shooters Extras” button. This brings up the Shooters Extras screen.
Select the drop down arrow and select events for this
shooter.

When you select the RV space selection you wish tab over to the Quantity and enter the numbers of days the shooter will be staying.

Then tab to the amount field, the system will calculate the amount due. When you tab again the system will prompt you to “Assign RV Space?”.

Select “Yes”, the next prompt will be “Display all spaces, “No” to display available spaces” selecting “Yes” will show all spaces including those already reserved.
Double Click in the Assign to area will place the
shooter in this space![]()

Find an available space, and then just double click in the Assigned to area, the shooter will be placed in this space.
Shooter will display in the Assign to area, the cursor
will be in the Arrival Date field.

Enter the arrival date and the system will calculate the departure date by the Quantity you entered in the Events master.
Through RV Space Master: Select the Vendor/RV Registration, then select RV Space Master.
Double click in the Assigned to of the space you wish to
assign.

With the RV space screen displayed double click on the space you wish to assign the shooter to.


The Select Alias drop down box will appear at the top of
the screen. Select Alias you wish.
The Select Alias drop down box will show up at the top
of the screen select the Alias you wish to assign to this space, enter the
Number of days and then the Arrival date the system will calculate the
Departure date.
After a shooter has been assign a space there are two ways to change that space. You can select “Register Shooter” from the main SASS Premier menu and select shooter you wish to change. Select “Enter Shooter Extras” from the shooters registration screen. When the shooters extras screen is up click on the amount field of the RV entry and press the tab key. Enter “Yes” to the “Assign RV space?” prompt and “Yes” from the next prompt. With the RV Space Master screen up just double click in the new space where you want shooter assigned.
When you double click a new space this prompt will let
you know that the shooter already has a space assigned.![]()

When prompted that shooter is already assigned a space just click “Yes” to move shooter and clear previous space.
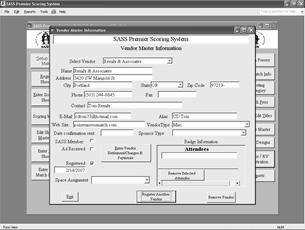
You can also select “Vendor/RV Registration” from the main SASS Premier menu and select the “RV Space Master”. Select the space you wish to move the shooter to and Double click the Assign to, select the shooter from the drop down list. You will be prompted that the shooter already has a space assigned and do you wish to clear previous space. Select “Yes” and the system will clear the previous space and assign shooter to new space. If shooter is reserving an additional space just reply “No”, you will then have to enter the number of days and the arrival date.
Shooter already assigned space.![]()
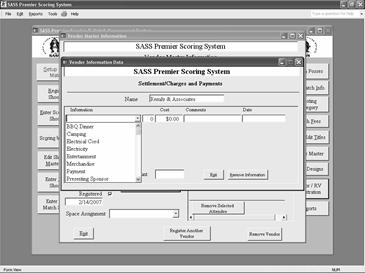
.
Vendor setup and registration.
Vendor
Setup and Registration
Vendors are
usually signed up by a different person than the one that does the shooter
registration, for this reason the vendor registration has its own backup and
restore. (See Vendor Maintenance). You can load the SASS Premier scoring system
on your vendor registration persons computer, they can
then setup all the vendor information and send you the backup files for you to
restore into your main computer.

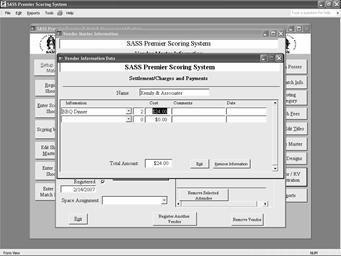
You will
need to setup some vendor information before you can start registering your
vendors.
The vendor
setup includes the following:
Space Master
Vendor Information
Vendor Type
Vendor Sponsor
Vendor Master
The Space
master will allow you to input a space number and a description of the
space. From the main menu select “Vendor
Master & Registration” this will bring up the above menu
Select the
“Space Update” menu button; you can now enter the space numbers and description
of the space.
Enter your space layout. You can use any type of space
numbering scheme you wish. Then
enter the size of the space and if the space has electricity.![]()
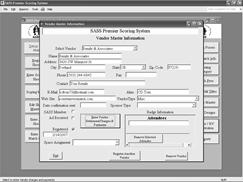
If the space
has an electrical connection you can check the “Electrical” check box. The two spaces to the right of that box are
used for Vendor name and Vendor type. These will be entered
automatically when you register a vendor in that spot.
One reason
for the Vendor type being listed is so you can better distribute your
vendors. You don’t want three clothing
vendors right next to each other.
You can
change vendor spaces after they have been assigned by going into the vendor
registration section and placing that vendor in a different space. The system will clear out the previous space
and assign the new space to the selected vendor. If a vendor decides not to take a space you
only need to go into the vendor registration and blank out the space section,
this will clear that vendor from the space and make it available again.
The vendor
information section works on the same order as the Events area of the shooters
section. You can enter any type of
information that the vendors will need.
Example: Tent Rental and Size, Dinner tickets, etc. You can also enter a Payment so as to track
payments made against outstanding balances.
To enter
Information Master select it from the “Vendor setup & Registration”
Vendor Information section allows you to set up the
charges for vendors. The system
comes with some already setup, check these out first before entering your
own, then just make any changes necessary.![]()

Enter the
description and if there is an amount you may enter it here. The amount can be the standard amount you
charge, but you will be able to change it in the registration section if you
are charging the vendor different. If
you enter Dinner tickets make sure that the word dinner appears some where in
the description ex: Saturday night dinner or Friday night dinner, with the word
dinner in the description the system will be able to then print dinner tickets
for those that you have selected to get tickets.
You can put
anything you wish into this table you don’t have to put money in the price
field. You can enter a dollar figure
later, or leave the money blank and just have if for information. All the information you select for a vendor
will show up on a settlement/charge and payment report.
Type master
contains description of what type of vendor this is, Clothing, guns etc. Select the “Type Master” from the Vendor
setup & registration menu.

This type
will show up in the Space master when you assign a vendor to the space.
Enter the
sponsor type into this master. Sponsor
would be like Stage Sponsor, VIP, etc.
You will want to have a sponsorship set up as none. When you set up a vendor you will need to
have something entered into the sponsorship area of the vendor master.

Select Add
New Vendor from the Vendor menu. Enter
the Vendors information, if you enter a name that is already on file you will
get a warning that this vendor name is already setup, or at least there is
another vendor with the same name or close to the same name. If you want you can continue setting up this
vendor of select No, this will bring up the vendor registration form where you
can call up the vendor’s name you were trying to enter as new and see if it’s
the same vendor. If it’s not the same
vendor you will need to exit the Vendor registration screen and go back to the
Add new vendor and enter the vendor as new.

You can also
enter a new vendor from the Vendor Registration section. See Vendor
Registration below.
This is the
main section of the Vendor Registration, from this area you will enter new
vendors, register them for your match and enter all other information.
If you already have vendors entered into the system you can select them from the drop down list at the top of the screen. To register a vendor just select the Registered check box, a date will display below you can change this date if you wish.
When selecting a vendor from the dropdown list just start enter the vendors’ name. If the vendor isn’t on file when you type the name the system will prompt you if you want to enter it as new? If you want just select “Yes” the Add New Vendor screen will display, fill in the vendors information and when you exit you will be back at the Registration screen with the new vendor highlighted in the drop down list, you must use the mouse to click the vendors name for the information go display. If you just press the enter key you will get no information on the screen and you will have to go back to the vendor selection area and select that vendor again.


In the
Attendees section you can enter the name of those persons that will be coming
with this vendor. You will be able to
print a badge for all individuals entered into this area. You can assign your vendor a space also from
this screen the Space assignment drop down list will show your space master and
any spaces that are already assigned.
When you select the “Enter Vendor Settlement/Charges & Payment” you
will get a screen that will let you select the information that this vendor has
requested.
Then select Enter Vendor Settlement/Charges &
Payments. This is where you enter
all the charges for selected vendor. Adding an Attendee to vendor
registration.![]()


Use the drop
down list to select the information, then tab to the next field and enter the
number of items this vendor requested.
If there is a price entered into the Information Master that price will
show up in this area. If you enter more
that a 1 into the number area the system will compute the price. You can change this price if you wish, just
highlight the price and enter the price you wish. You can then enter a comment into the comment
area and a date.
If you
select the payment, when you enter the amount it will automatically turn into a
credit and subtract from the total amount that shows at the bottom of the
screen. If you wish to delete an item from the list select the item and then
click the “Remove information” button at the bottom of the screen. When finished with the information section select “Exit”.
Select the drop down list to select information or
charges for vendor.![]()

Dinner ticket selected with quantity of 2, the amount
will compute. You can enter any
comments in the comment section.![]()

Check mark areas for SASS Member, Ad Received and Register.

There are
check box areas for SASS Member, Ad Received, and Register. If you put information in the Information
Master regarding ads when you receive the ad from the vendor you can check this
box to let you know that the ad has been received the current date will appear
below the Ad Received area. You should
also put this into the Information Master this will let the vendor know what
size ad they ordered and the cost.
When you
select the Register check box the data of registration will appear below the
box.
When you go to assign the vendor a space any spaces that
are filled will show with the vendors name next to it. The vendor type will also show, this can
help you distribute you vendors so all leather vendors are not right
together.

When you display the Vendor Space master you will see
the assigned vendors.![]()


There are a
number of vendor reports, after you have registered some vendors check out some
of the reports that are available.
You can
print confirmation letters for your vendors.
Confirmation letters are printer using MS Word, when you select “Print
Confirmation Letters” the following will happen. A report will print that will show the
Settlement/Charges and Payments, a Deposit report listing all payments received
since you last printed confirmation letters. A mail merge extract file will be
extracted to a directory called C:\CowboyExtracts the file name is VCLetter.txt
and will contain the information needed to merge with your confirmation
letter. There is a sample confirmation
letter in the C:\cowboyaction directory called “Vendor confirmation letter1.doc”
you can make up you own letter just make sure that the file name is the same. MS
Word will start and load the Confirmation letter, all
you need to do is select the Tools menu and Merge.
Individual Confirmation letters:
When you
select “Print Confirmation Letters” you have the option to print all letters
since last time or to print an individual letter. When you select to print an individual you
will need to enter the Vendor ID number, you can find this on your vendor master
listing. You will print the confirmation
letter and the Settlement/Charges and payment reports.
Vendor badges is another report the uses MS Word to do a mail merge the
badges are printed on standard Avery labels 5383, these can be picked up at any
office supply store. You can use any
label you wish only you will need to set up the template and call it Vendor
Badges1.doc the extract file for the badges is located in the C:\CowboyExtracts
directory with the file name of VBadges.txt.
Badges will print for all individuals that were entered into the
Attendees section of the Vendor registration form.
Vendor
dinner tickets like the shooters tickets will print and individual ticket for
each attendee. Like the shooters dinner
tickets there will be an extract file created in the C:\CowboyExtracts
directory. The file name is
VDTickets.txt and contains Vendor Name, Dinner name, Attendees name, and ticket
number (1). You can create your own layout of the dinner ticket by modifying
the existing template. The template name
is Vendor Dinner Tickets.doc and resides in the C:\cowboyaction directory, just
be sure to us the same as the program will call up that name when starting MS
Word from the scoring program.
The format
for the dinner tickets is standard Avery 8376 Business Cards.
Vendor Sponsor Letters:
Sponsor
letters can be used send information to all vendors in your system. You can have more than template set up. Sponsor letters are setup like certificates
for every template you want to setup all you need to do is add a number to the
end of the template name. Ex: all
sponsor letters have the same name except of the last number “Sponsor Letter”
is the standard name and must be that way, then all you do is add a number to
the end “Sponsor Letter1”, “Sponsor Letter2” etc. When you are ready to print the sponsor
letter the system will prompt you for a Sponsor letter number. All you do is enter the number you want. Using this method you can have different
letters to send out at different times.
Just make sure that when you setup the templates for the different
letters that you use the same merge fields name.
Vendor labels will print mailing labels for all vendors in your
system. The labels are standard Avery
5160 three up labels.
The backup
and restore for the vendor is separate from the regular match backup and
restore. The reason for this is because
most clubs have the vendor registration done by a different individual. The person doing the vendor registration can
just do a backup of the vendor information and send it to the registration
individual and they can restore it with out having to worry about the match
registration.
The backup
and restore are the same as that in the regular match section of the
program. You can create a separate
folder just for vendors backup if you want.
Some clubs have annual dues, you can produce these billings through the system. There are some requirements that need to be setup before this can take place.
You will need to setup the club dues amount in the parameters section of the program. This is done by selecting “Setup New Match” from the Main Menu. Enter your annual dues into the Club dues section. This usually only has to be done once, unless of course you up your dues. You will also want to enter an address city state and zip as this will be the return address that will show up on the bill.
Enter club mailing information here. Enter the annual dues ![]()


Because dues are billed on the anniversary of the shooter joining the club you will also need to put the Date Joined into the shooters record. This was mentioned earlier in the section “Edit Shooter Master File”. When this information is setup you will be able to print dues and collect payments. The billing section if located in the Reports Menu.
Select the button “Billing”![]()

Select “Print Bills”![]()

Enter the billing month you wish to bill, for July enter 7.![]()

When you select the “Print Bills” the system prompts you for the billing
month, for July you would enter 7.

The billing is another Word merge, you can create your own invoice, place
you logo on it and have any type of text you wish. This is only the example that the system
comes with. When you create your own use
the merge fields that the sample shows, if you wish you can send an example of
your invoice/statement to cdtom73@hotmail and I’ll fix it up for you.
At this point you only need to do the standard Word mail merge and print
your invoices/statements.
When you receive your shooters dues payments you enter them into the
system. Select “Enter Payments” from the
Billing Maint menu.
Select “Enter Payments” ![]()

When entering a payment just click the Dues Paid check
box and enter the date.


The payment entry form displays those shooters that still have dues
outstanding. Just click the Dues Paid
check box and tab and enter the payment date.
When you are finished just select Exit.
You can print a billing report for any month,
the billing report is located in the Reports Menu under the Special reports
section.
On the club
billing main menu you can select to print a past due report. This report will produce a list of those
shooters that have not paid their dues, it will also bring up a past due letter
that you can use the mail merge feature of MS Word to create the past due
letter. This letter is located in the C:\SASS
Premier directory with the name Billing Past Due letter.doc you can make any
changes you wish to this letter. The
logo on the letter is named billingletterlogo.jpg if you have your logo in a
jpg format rename it to the billingletterlogo.jpg and it will show on your
billing letters
There are a few things that will need to be done to the Cowboy scoring program. One of the main things is to backup the data. The Backup and Restore can be found on the “Main Menu” under “Backup Data or Restore Data”.. When you select The “Backup Data or Restore Data” your first prompt will be to Enter 1 (default) to backup your data or 2 to restore data. If backing up press “Ok”, This will bring up a prompt for “Select your own drive and backup folder? No will backup to default directory” If you select “Yes” to select your own drive and backup folder the system will display a standard Windows lookup window. Select the Drive and folder you wish to use, the folder must already be located on the drive. No will backup to the default directory C:\cowboyaction\backup, select ‘Ok” when complete.
If you decide to backup your data by match I would suggest that you create a set of folders on your C: drive in a folder called cowboybackup (or something like that) then create a folder for each match with the date of your matches, example Backup02142004, Backup03142004 you can do this through windows explorer. Then when you do the backup select your own drive and folder, find the folder for the current match and select ok. This way you can always go back to a match and restore that match if you have some questions about the match.
You can also backup your
data to floppy disk, buy a box of floppies select backup to your own drive and
folder and select the Floppy Drive (A).
Put that disk away and use a new one for your next match. You can keep backup data for all your matches
as far back as you wish. If you need to
restore a match for any reason just get the floppy from your backup history and
restore that data to your system. (Note: be sure you have a current backup
of you data before you restore an old one.)
If you need to restore data you again select “Backup data or Restore Data” from the main menu. At the first prompt you will enter a “2”, select “Ok” the second prompt will be to verify that you really want to restore data, select “Ok” to continue. You can then select restore from your own drive and folder or restore from default directory. If you select to restore from your own folder you will get the same window you received when you did the backup. Select the drive and folder where you wish to restore from and select OK.
Backup/Restore Data. 

Scoring Maintenance screen
Select 1 to backup or 2 to restore.
Enter a 1 to backup of
2 to restore your data.


Select the + sign next to the Local disk C. This will
display all folders on your C drive.

Scroll to the location of where you created your backup
folders and select the folder. Then
select OK .![]()

To restore data, select the Backup/Restore data from the Main Menu and select a 2 to restore. Then select “Yes” to select your own folder and drive and locate the folder where you backed up your data and select OK. The system will restore everything back to where it was when you backed up.
You will also need to delete some of the history that you have accumulated over the time you have used the program. In the Scoring Maintenance section you will find two areas 1) Delete score history and 2) Delete registration history. When you select either one of these options you will be prompted to enter a beginning date and an ending date. The program will then remove the history between those two dates. This can be done once a year or more often depending on how much history you wish to keep. You can run yearly history reports before you delete any history if you wish.
Special Reports
- Select REPORTS from SASS Premier Main Menu
- Enter on arrow next to box with Special Reports
- Select name of report (more is there than what shows in window – arrow down on right of screen to see more reports).
- Reports will appear in another window that you might have to pull up by moving your cursor down so that the hidden tool bar will appear and then select the appropriate box with the report.
This special section has been created for clubs that have a special award that they want to present, from Reports on the top menu bar select Special awards.
Cup Description:
Cup competition, which consists of a variable number of shoots, each containing 4 - 6 stages/match. The match scoring can be either by total time or by rank. Scoring for the whole cup is by ranking, so that the winner of a match gets 10 scoring points, the second gets 9, the third gets 8 and so, until the tenth in a match gets 1 scoring point. All the others are left with no ranking points. By the conclusion of the cup all the ranking points in the individual shoots are added together by each shooter and the one with the highest points is the winner. Usually, if six shoots are held, only the best five rankings of each competitor are taken into calculations. There is of course always the possibility of a tie situation at the end of the cup. This is solved with a shoot off.
How the system works:
The first prompt is for the number of matches you require to qualify for the Cup Award, you are then prompted for the Beginning date of your competition and the ending date. The report that follows will have the list of shooters and there total points, if six stages were selected then the max rank points will be 60.
Silver Buckle award description:
Each shooter must shoot a given number of stages during the period. The lowest rank points for those stages are the ones used. Example if a shooter shoots 10 stages and 6 are the number of stages required then the lowest 6 stages of the 10 will be used.
This award again will prompt for the number of stages you require for this award, and then the Beginning and ending dates for the period of the competition. The award process gets the rank points for each shooter and then tallies them up. The shooter with the lowest rank points in each category is the winner. The report will show the shooters by category with the lowest rank first.
I will be more than happy to accept any questions, comments or suggestions you may have regarding the Scoring program. If you would like to have something added to the scoring program, we can do that to, depending on the complexity of the change there may be a charge involved.. E-Mail your questions and comments to cdtom73@hotmail.com I’ll try and get back with you in a timely manner.